Saturday, September 17, 2011

Fall Decor


So being down here in the south there is no such thing as a "season".  There is no winter, no spring, and no fall. There is summer.  The only way I know it is September is the weather has finally cooled off enough to stay under 100* F a couple days a week. Everything is just as brown and hot as it was mid July. Soooo... in my sanctuary of an apartment I am working to "autumn-ize" my decor. I went looking for old shirts and any other scraps in fall colors I could use.

I changed up my lamps. I don't know why this picture makes it look so crooked... must be the horrible lighting and my lack of a decent camera. Or it's just my lack of photography skills, ha!

I dug up a picture I painted as a Sophomore in high school. Random? Very. Why do I still have it? Who knows.


Pulled out a lace table cloth and put the our random sword (gift from my grandpa) on it for some character.


Finally, I added a homemade monogram wall hanging to make it more personal. (Tutorial to come)


Thursday, September 15, 2011

Tuna Crochettes


 As many people know, tuna fish is something that is extremely healthy. Low in fat and high in protein it's a common element of a body builders diet. However, eating tuna without high fat condiments like mayo proves to be very difficult. I have, for a number of years, eatin tuna directly out of the can with only pepper for taste and water to wash it down. Yuck. But let not your heart be troubled! I have found the solution! By eating tuna crochettes you are able to get all of that protein with a very small amount of added fat. They are easy to eat by hand and I love eating them dipped in a little ketchup and baked potato wedges. For those with kids who love those nasty freezer fish sticks... this is an amazing alternative!

2 cans tuna, drained
2 tsp dijon mustard
2 tsp pepper
1 tsp salt
2 eggs, beaten

Combine all ingredients in a bowl and mix well. Then begin making 2 Tbs balls of the mixture. Place each ball on wax paper or tin foil and allow to sit for 15 minutes. This will allow the extra water and other fluids to "drain" out of the balls. (Make sure you don't skip this step. The crochettes will fall apart as you cook them if you don't allow them to sit.)


After the fifteen minutes, take your balls and roll the balls in bread crumbs or oat crumbs (the oats are my favorite and they make for a crunchier bite). Then place balls in a pan of 3-4 Tbs of hot olive oil. Take a spatula and squash the balls into little patties. Cook each side on medium heat for 3 minutes.

Serve and enjoy!

Monday, September 5, 2011

Doggy Diaper Bag


This only took me about an hour to make and it worked really well on a trip we went on a couple days later.  Because I used a bag that already had a bottom in it the process was super simple and quick.

If you make one of these make sure the dog food bag is one of the plastic sturdy ones. I washed mine out and it got rid of the dog food smell.

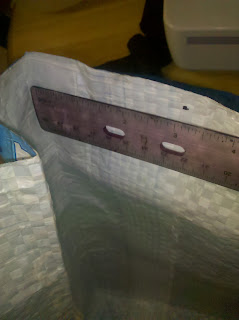
The first thing I did was measure from the bottom of the dog food bag and mark the desired height of the bag. I chose to make mine tall enough so you can see the "puppy chow" label. Then cut across.
Because I was short on time I chose not to "hem" the edges of the bag but I wanted to make sure that it didn't have the chance to unravel. So I took a lighter and used the heat from the flame to melt the cut edges.

Now for the straps. I used the leftover scrap from cutting the top off the bag for the straps. How wide you want the strips to be is up to you. I basically cut the stips then folded them to the size I wanted. Doing it this way I was able to get the "puppy chow" to be on the front strap. Make sure that the edges of the strap are overlapping that way you can stitch through both flaps at once.


Then take your folded strap and stitch the overlapping flaps down.

I wanted to make sure that the stitches had more stability so I used a zigzag stitch but you can use a straight stitch if you wish.

After that I measured and marked where I wanted my straps to be.

Then I attached them.


The end! It turned out to be very sturdy and worked perfectly for all of my puppys things.


Thursday, August 25, 2011

Best Homemade Granola Ever


So I think my search for an amazing granola recipe is over. This one is not as "healthy" as the banana granola recipe because it has brown sugar in it. But I like it better because this recipe creates a nice crunchy granola that goes great with my daily 1/2 cup of Greek yogurt. Mmmm... it is a must try and so easy to make!

2/3 cup packed brown sugar
1/4 cup apple cider (I juiced half an apple and it turned out great)
2 cups rolled oats
2/3 cup chopped/sliced roasted almonds or pistachios
2/3 cup cereal nuggets (like grape-nuts but I didn't have any so I used some corn flakes to add more crunch)
2/3 cup dried fruit (I don't like dried fruit but cherries, raisins, apricots are some good ideas)
1/2 cup sunflower seed kernnels
1/2 tsp cinnamon
1/4 tsp salt

In a large non-stick skillet, combine sugar and cider. Cook on medium-high heat about 3 minutes or til sugar dissolves, stirring frequently.

Stir in oats and remaining ingredients. Continue to cook in skillet 5 minutes or until granola is lightly browned, stirring frequently.

If you want extra crunchy granola, bake on 325 for about 15 minutes stirring frequently to keep edges from burning.


Cool completely. Store in air tight container up to a week.

Banana Granola


So a couple Fridays ago I was brain storming ways to eat healthier and cheaper. After much deliberation, I decided that making my own granola would be a good way to start. I went searching for recipes and found some great ideas that I mixed and matched to come up with my own healthy granola.

This is the granola recipe that I came up with.

2. cup rolled oats
1 ripe banana
3/4 cup water
1 Tbs honey/syrup
1 tsp cinnamon
1 tsp vanilla
1/4 tsp salt
1/4 cup roasted almonds, sliced
1/4 cup sunflower seeds

First,  blend banana, water, syrup/ honey, cinnamon, vanilla and sea salt.


In large bowl, toss wet ingredients with oats, and nuts.

Lay out on baking sheet and bake for about 40 min stirring every 10 minutes.


Wednesday, August 10, 2011

The Joys of Juicing


Some time last week my husband and I watched the documentary Fat, Sick and Nearly Dead. It was very interesting and sparked an interest in other food research. We quickly discovered that we, as most Americans, were remarkably deficient with our fruit and vegetable intake.

After doing some further investigating we decided to try a juice fast. Basically, a juice fast is when a person abstains from solid foods for a period of time and only drinks fresh veggie and fruit juice. We would juice lots of veggies and fruits and that is what we ate for two days. (Now, please know that I do not claim to be a professional and do not recommend doing a juice fast without first consulting a dr) Originally, we were going to do a juice fast for about a week but because we are very active and workout a lot we decided that it would be better for us to take in solid foods as well. So we began eating lots of fruits and veggies with the juice and gradually added proteins back in to our diet as well.

It has been almost a week since we got the juicer and I do not regret getting the juicer at all. I see a juice fast as a "recalibration" of my digestive system and taste buds. I have never wanted to eat fruits and veggies like I do right now. If I think about a Mcdonalds Big Mac or any other fast food meal I just about vomit in my mouth. Studies have shown that people benefit from every meal being 51% raw fruits and vegetables and I love knowing that I am getting that in a concentrated juice form.

Now, when I don't get my juice for a while I begin to feel groggy and tired. I try to take in at least a half cup of juice per meal (every three hours) and I am able to go the entire day without feeling tired at all.  It is an amazing feeling to get all the vitamins I need naturally. It's something that I can't really convey in words and so I would encourage all to get a juicer and add natures juice to your diet.


Sweet Lemon Bread


This bread is absolutely amazing. I love baking quick breads like this one because I don't have to wait for it to rise before I can stuff my face with it. It ends up being solid enough to eat by hand making it perfect for a quick breakfast, addition to a lunch, snack or a yummy dessert.

Prep: 15 min
Bake: 55 min


1 3/4 cup all-purpose flour
1 tsp baking powder
1/2 tsp salt
1 large lemon
1/2 unsalted butter, at room temperature
1 1/4 cups granulated sugar
2 eggs
1 tsp vanilla
2/3 cup milk

1. Preheat oven to 350*F. Oil a 9x5 in loaf pan.
2. In a bowl, use a fork to stir four with baking powder and salt. Stir in grated half a lemon.
3. In a seperate bowl, use an electric mixer on medium to beat the butter. Gradually beat in 1 cup of the sugar. Beat for 2 min. Beat in eggs, vanilla and milk.
4. Using a wooden spoon, stir in flour mixture just until batter is moist. Don't overmix. Pour into the loaf pan and smooth the top.
5. Bake in the center of the oven until golden and a skewer comes out clean, 55-56 min. The top cracking is normal as the top sets before the bread has fully risen.

6. While the loaf is baking take your lemon and squeeze about 3 Tbs juice into a small bowl. Stir in 1/4 cup sugar but don't worry if sugar doesn't fully dissolve.

7. When your loaf is fully baked, remove from oven and place pan on a rack. Immediately use a skewer or fork to poke several holes into the loaf. Drizzle or  brush half of the glaze onto the loaf and let sit 10 min. After running a knife around the sides of the bread, turn out loaf then place top side up on cooling rack. Drizzle or brush remaining glaze over the loaf.
8. Dig in!

As a side note, Cocoa Bean seems to have taken a liking to the smell of lemon.


Thursday, August 4, 2011

Healthy Pizza


We all love pizza, right? If you are anything like me, cravings for things I should not have inhibit my ability to think rationally and pizza is right up there with Twizzlers and dark chocolate. Unfortunately, the average caloric intake of a slice of Dominos deep dish is not worth it for some of us. So I did some searching and tried a couple of pizza dough recipes. This one is my favorite so far and I wanted to share it because it is just oh so yummy.

Whole Wheat Pizza Dough
Prep time: 20 minutes + 30-60 minutes rest time
Cook time: 425 degrees for 16-20 min

1 tsp white sugar
1 1/2 cup warm water (110 degrees)
1Tbs active dry yeast
1 Tbs olive oil
1 tsp
salt
2 cups whole wheat flour
1 1/2 cup all-purpose flour (seperated)

1. In large bowl place your water and sugar. Sprinkle the yeast on top of the water and let sit about 10 minutes til foamy.
2. Stir in your oil and salt.
3. Add your wheat flour and 1 cup of the all-purpose flour. Stir til dough comes together.
4. Spread your remaining 1/2 cup of all-purpose flour on a hard surface and pour the dough onto the flour. Knead dough until all of the flour has been picked up and dough is smooth (about 10 minutes).
5. In medium bowl, pour a bit of oil and turn dough til covered in the oil.
6. Cover, lightly with a tea towel and allow to rise in warm room for about and hour or til double in size.
7. Preheat oven to 425 degrees.
This makes a thick crust pizza so for thin crust divide your dough into two pieces. Roll out, add your toppings and bake on oiled baking sheet 16-20 minutes.
Enjoy!

For less calories you can use these healthy replacements:

Turky pepperoni
Fat free mozerella cheese
94% fat free ham


Thursday, July 21, 2011

Earring Organizer


Supplies:

Picture frame
Mesh ( I got mine a bag of oranges)
Glue gun
Scissors
Black spray paint (if your mesh isn't black)

This didn't cost me a penny to put together and it organized the mess of earrings I have. If your mesh is orange like mine was spray paint it black. Then take your mesh and cut it to the size of your frame. Now you can paste it to the back side of your frame. After that is done you can decorate it with your earrings!

Saturday, July 16, 2011

Health Kick


Remember how I said in my last post that we gained a few pounds? Well we are on our health kick. We have actually been doing much better with our eating for a while now but I am so excited about all this stuff that I have to talk about it. Basically, these are all supplements that we take to help us be healthy.

Carb free protein powder for meal replacement.
Liver X to help get rid of the nasty toxins in our systems (it works hard for us so it deserves a little help)
Multi Vitamin so that our bodies know it is getting all the vitamins it needs so there is no need to hold on to extra calories
Fish Oil so my skin is smooth as a babies bottom ;)
Glutamine for assisting the muscles to recover from lifting weights
Creatine to assist the muscles to work harder and longer for better results in less time.

I think that I am going to start looking for some fun healthy foods. I will test them out and share them with you!

Let's hear it for being healthy!

Faux Metal Star


 I found this idea on one of the first blogs I ventured to here.  I used them for 4th of July decoration but I look forward to using them for Christmas as well.

It took me about 6 months to accumulate this many pie pans for the stars ( we ate a lot of pie and consequently gained a few pounds). You can also buy oven liners from the store depending on the size of star you want.


 The first thing you need to do is cut off the outer rim so that all is left is a flat surface.

 (These will be coming back in a future craft)


Then find yourself a picture of a nautical star, trace the pattern onto the foil then you get to cut it out. When you cut make sure you leave a 1/8 inch around the outside. This will provide a folded edge and will keep fingers from getting cut up.

 When you have the amount of stars you want you can do your painting! Have fun!

Tuesday, July 12, 2011

Bisquick Cornbread

I have had a few requests for the this recipe and I love sharing it! Makes me feel like I can be a part of the every day living of those I care for even if they are thousands of miles away. Love you guys!

1/2 lb margerine/butter (room temp)
1 cup sugar
2 eggs
2 cup Bisquick
3/4 cup cornmeal
1 cup milk

Preheat oven to 350 degrees.

Mix all ingredients then pour into lightly greased 9x13 pan.

Cook at 350 degrees for 25-30 minutes.

Enjoy!

P.S. I personally love to smother my slice in honey or maple syrup. Mmmm comfort food at its finest!

Friday, July 8, 2011

Friday Failure - Pug Cake

Well as most of you know yesterday was Mr. Creoles birthday. As such, I wanted to do something fun and meaningful. Both of us are major pug lovers ( we have ourselves an adorable brindle pug and wish we could have more ) so in addition to making dinner I thought I would make a pug cake.


Since there is just the two of us to eat a cake I decided to make it quite a bit smaller than the ones in the pictures. I started out with a sheet cake and did some stacking and carving. This is what it looked like when it was ready to be covered in fondant.


Now this is where the failure begins. I wanted to try my hand at making fondant myself but because it was 3 in the morning and I had limited supplies I had to try my hand at this recipe. I followed the recipe exactly and it ended up looking great... til I went to roll it out.


Turns out this fondant will stick to anything and everything including itself.  It dried way too quickly to be of any use and ended up looking like this mess. I couldn't even manage to get the fondant on the cake in one piece.


So after I ended up tearing all the pieces off of the cake in frustration this is what was left of my cake.
Sad day.


After realizing that my pug idea was not going to be a success I racked my brain for alternative solutions and came up with this.


I took the cake, broke it up into pieces and set them aside.


Then I took some strawberries I had in the fridge and sliced about 2 cups worth. Put them in a sauce pan with about 1/4 cup sugar and brought to a boil.


I boiled the strawberries for 10-15 minutes to create some thickness. Removed from heat and let it cool.


I then took my cake crumbs and spooned some into a glass. Then a few spoonfuls of strawberries.


Then add a couple scoops of cool whip. Repeat.


Mmmm! Victory at last!!

Wednesday, June 29, 2011

4th of July "USA" Decor

This project didn't cost me a penny to do. Can't complain about that!

Supplies:

*Cardboard
*X-Acto Knife
*Old Book
*Elmers Glue
*Tape

Take your cardboard and trace out the shape of letter you wish to have. I drew out my own on paper but I'm sure it would be very easy to print off a letter from a word document. You will need two identical pieces for each letter. One for the back and one for the front.

 Take the leftover cardboard and cut out strips to bring the two pieces for each letter together. After you have it all cut out you can start to tape it all together. When it is all together it will look like this.
Now you are ready to start with the paper mache. Take your glue and mix with water. 1 part water to 3 parts glue. Using pages from your book rip them into strips, dip in your paper mache mixture then smooth on your letter.


When it is completely covered and you are satisfied all you need do is wait for it to dry :)